Ch002 - Jumping Right In
Jumping Right In
To get started, let’s alter the graphics and game-play of a game that has already been made. This will help us to see some of the code involved before we have to start writing our own. This idea is to make the whole process seem less scary, by making quick changes which we can see the impact of. Like in a game, this quick feedback gives us a sense of control.
Getting started with the Glitch.com Codeplayground
We are just about to use Glitch to play and mess around with games. Here are a few things to help you get started.
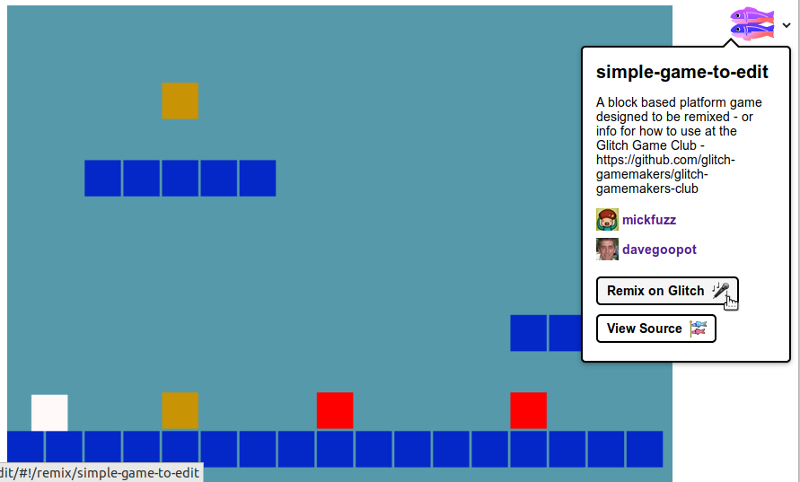
- You can hit the Fishes in the game playing window and choose Remix on Glitch to make a new copy of this game so you can make your own changes (only do this once!)\
- The JS file with the game code should show by default but click on game.js in the list of files on the left if it doesn’t
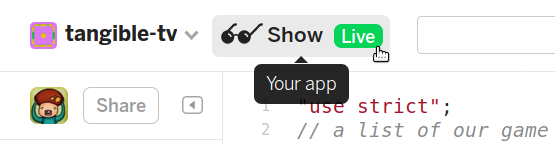
- After making your changes, click on Show Live and your browser will open a new tab allowing you to play again with the updates
- Keep the two tabs open and swap between the code view and your game view to make more updates
- Once you have started working, if you lose your code page then you can click on the Fishes and select View Source to make more change
Have a play with a simple platform game
Play this game using the cursor keys to move - https://grid-game-template.glitch.me/
You may notice that the game is impossible. It is. But the good news is we can fix it. To do this hit the two fishes at the top right of the screen and choose Remix on Glitch. Remixing means we create our own version of the game that we can change. You now have the following challenges which are available as a printed document of cards here.
What follows is a list of the kinds of changes that are suggested on the cards.
Starting challenge - Change Gravity: find the gravity variable and to change the number so that you can complete the game. To do this change the following line.
var gravity = 500;
Starting challenge - Change Background Colour: You can Change the background colour of the game.
game.stage.backgroundColor = "#5699ab";
Starting challenge - Change Velocity Settings: You may think the game is a bit slow, changing velocity lets your character moves faster to the left and the right and up when jumping. Play with the following lines
  var velocity_x = 100;
  var velocity_y = 300;
Next level challenge - Add more hazards and coins: change the game so that there are more hazards and coins, do this by altering the o’s and h’s in the grid shown in the code example below
    // Design the level. x = platform, o = coin, h = hazard.
    var level1 = [
        "                 ",
        "                 ",
        "    o            ",
        "  h              ",
        "  xxxxx          ",
Next level challenge - Make your own pixel art: see the help section below for how to use piskel and import those images into your game.
Next level challenge - change the platform layout: change the platform layout of the game to make it more challenging alter the x’s in the grid code show below
Boss level challenge - Balance your game: - Use all your knowledge of velocity and gravity and the placement your platform, hazard and coins to make a challenging game that is still possible to beat
Create your own characters
We can use a online sprite / pixel art editor to add our own characters. There are many tools you can use but let’s use an online editor called Piskel. You don’t have to log in but it can be a good idea to do so you can save your work. To get started point your browser to https://www.piskelapp.com/ and click on Create Sprite.
When you create your sprite, by default it creates one 32 pixels high and 32 pixels wide. This is perfect for our game.
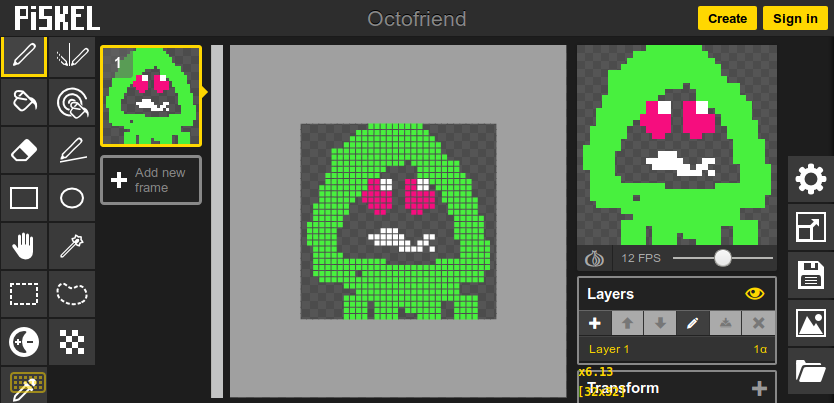
Piskel is a pretty intuitive tool to use so we’re not going to give you full instructions for how to make your character here. But here are a few tips.
- In your tool bar on the left, you can select the different icons to draw and edit your images.
- You can change the size of your drawing tool by clicking on the different sized squares above the toolbar.
- You can change the colour of your drawing tool by clicking on the block of colour below the tool bar
- It is possible to create animated sprites by clicking on Add new frame or duplicating your existing frame
Let’s start with a one frame static Sprite. When you are happy with the single frame you have created we are going to export it. Click on the export icon - a mountain - on the right.
We are going to export a PNG image to a bit of code called a data URI. So click on the PNG tab and then select the Open option under Spritesheet data-uri export.
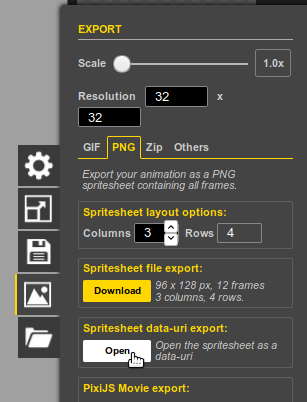
A Data URI is a way of saving an image or other kind of data as a long-ish stream of code. It looks kind of scary but we don’t need to understand it at all. We just need to know what to do with it. Now copy the text that appears on the screen to your computers clip board using Control + C on your keyboard or right clicking the mouse and choosing Copy. This is our image as data.
We are now ready to go back to the game code to add our own character. Look for the piece of code that says:
game.load.image("player", "https://cdn.glitch.com/05027ea3-803e-2Fplayer.png");
Replace the code between the last set of quote marks. Make sure to keep the “player” part there. Just replace that code that is highlighted in the image below with the code you just copied. To do this you can use Control + V on the keyboard or right click and choose Paste.

Let’s see what that looks like by clicking on Show Live to see our gave. You should now see your character as the player in the game. If it doesn’t work then go back to your code and try the process again. It is easy to make mistakes when copying and pasting like this. Part of our job is to get used to making these kinds of mistakes and going back and fixing them.
Extra Activity
If you have more time then you can do the same process of making your own pixel art for the following:
- replace the yellow blocks coins with your own design of a reward, a coin, star or simlar
- replace the red hazards block with an image that students have to avoid
- replace the blue blocks with your own image of a platform
Debugging your code in Glitch.com
So that’s it. We have done our first bit of Javascript coding. Ok, we didn’t write the game from scratch. But a lot of coding is about adapting what someone else had done before. A lot of the code we are going to meet can be quite readable. Take the following code.
game.load.image("player", "http://digitalducks.org/images/ggc/player.png");
Some of the language is very similar to real English this. Here this line loads an image into the game and gives it the name player. At the same time, somethings look quite intimidating. There are “double quotes”, normal brackets (), curly brackets{}. These do all do slightly different things. Don’t worry, we’ll pick them up as we go along by looking at and writing our code.
The Glitch website can help us if we do make a mistake and the code stops working. Imagine you paste in some code from Piskel, it is easy to delete some code at the end - say the "); -. You end up with the following
game.load.image("player", "data:image/png;base64,iVBORw0KGgoAAAANSUhEUgAAAB4AAAAeCAYAAAA
     EUgAAAB4AAAAeCAYAAAA7MK6iAAAAKUlEQVRIie3NoQEAAAgD
This is not going to work and will give us an error, hopefully one that we we can use to help us work out where the problem is. In this case it does give an error as shown by the red dot.

Hover over this red dot to see the full error.

In this case, there is a similar line of code following it. So to correct our code we can see how it is different from that line and see that we need to type the missing ending code of "); If we add that back in then we can say we have fixed a bug. Debugging is finding and solving errors in our code.
If we have other mistakes we could try some of the following:
- reading the error message to see if it tells us what kind or error it is
- looking at the relevant line of code and comparing it to other similar ones in our program (is there anything different/ missing here)
- if that doesn’t work try going back to the original project that you remixed from, view the source it again to see the working code and then comparing that working code your broken code
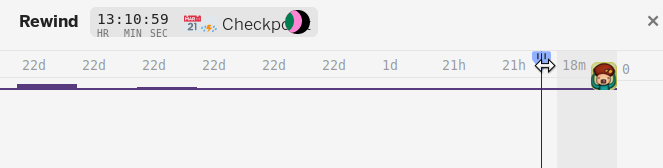
- If you are still stuck then you can click on the << icon on the bottom left of your project to rewind the work you have one by minutes or even days.
End