Ch023 - Game Space: Add Game Over Screen
Game Space: Add Game Over Screen
The game mechanic of jumping on enemies to get rid of them has been made very popular by Mario games. It is a great way to use the jumping dynamic in a creative way. We can use the same technique as many Mario games use to do this. An enemy will kill our player unless our player is falling when they make contact.
Check the Code: what we need to know and do
Our mechanic relies on us being able to check if we are jumping on our enemy. We will do this by checking to see if our player is on the way up or coming down from a jump.
To be able to do this step it would help if you knew about the following from this book;
- Understand how our game structure works - see Understanding our Game Structure
Going over the code:
The code for a minimal example of the Game Over screen is shown here - https://jamm-labs.github.io/ggcp/game-over-state-add/game.js the most simple video / computer games have several states, say an welcome menu, a play state, a win state and a game over / you lose state. We can add these different states into our game. At the moment we only have one state our “Play” state. In our code this is an object called playState.
At the moment, if you win or if you lose the game restarts.
To solve that let’s add code which recognises when you have been zapped by an enemy and shows a game over screen. Let’s keep the game over screen very simple and just add some Game Over text and a Timer to restart the main play state after 3000 miliseconds (3 seconds).
Add the following to your code very close to the very end of your code just before the end lines where you have the game.add.state line.
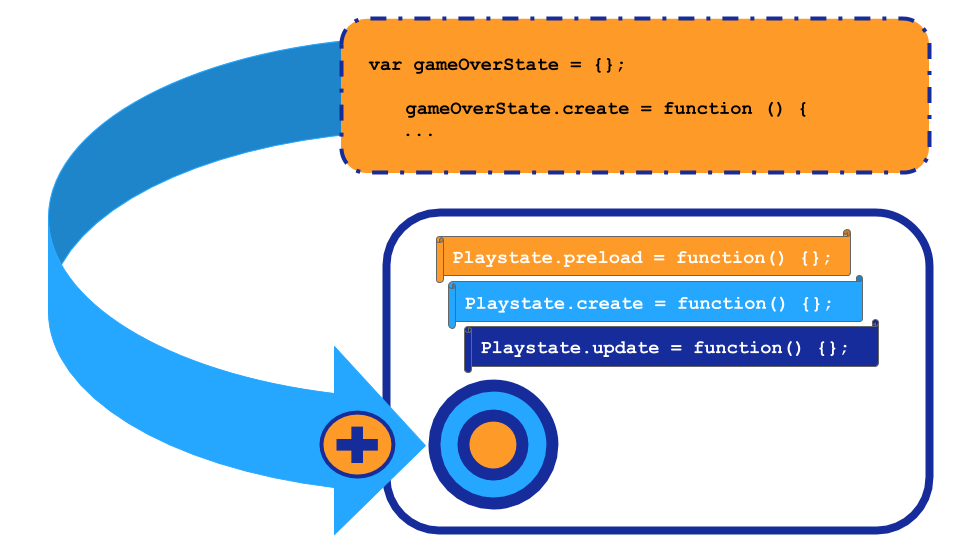
    var gameOverState = {};

    gameOverState.create = function () {
        this.gameoverText = game.add.text(10,10, "Game Over", "0:00");
        this.gameoverText.fill = "#ffffff";
        this.time.events.add(3000, this.restart, this)
    };
    gameOverState.restart = function(){
        game.state.start('play');
    };
This creates a completely new state with its own functions. We only need create and restart here. The create function add some text to the screen and then after 2 seconds calls the restart function of this new state. The restart function here is is similar to our normal one it just restarts the other play state.
Towards the the end of our project code you will see a line containing game.state.add for our play state, Just after that you can add one for game over state
game.state.add("play", playState);
game.state.add("gameover", gameOverState);
game.state.start("play");
We also need to change what happens when the player hits the hazard to indicate it is “game over”. If you are writing your code from scratch, then replace the line in the hitHazard function which reads game.state.start(“play”); with the following line which is going to start our game over state;
var hitHazard = function () {
  player.kill();
  game.state.start("gameover");
};
We you may well want to create two more states, one for an opening scene or starting menu called startState and another called winState for if you win the game. We haven’t written or added these state objects to our code here. But you can follow the same pattern to see how they might be implemented.
There is a chapter specifically looking at creating a starting scene too - see Adding a Cut Scene.